As the leaves begin to change and the temperatures start to drop, it’s a clear sign that fall and winter are just around the corner. While the changing seasons bring cozy nights by the fire and festive holidays, they also bring colder weather that can put a strain on your home’s plumbing system. Preparing your home for these colder months is essential to ensure comfort, safety, and efficiency.
In this blog, we’ll guide you through essential steps to ready your plumbing system for the fall and winter seasons. From inspecting and insulating pipes to preparing your water heater and outdoor plumbing, we’ll cover practical tips and expert advice to help you avoid common cold-weather plumbing issues. Whether you’re a seasoned homeowner or new to maintaining a property, this guide will provide valuable insights to keep your home running smoothly all winter long. So, let’s dive in and get your home ready for the chillier days ahead!
Check Your Heating System
As the weather cools down, your heating system becomes a crucial part of maintaining a comfortable home. Ensuring that your heating system is in top condition before winter arrives can prevent unexpected breakdowns and keep your energy bills in check. Here’s how to get started:
Importance of Scheduling a Professional Inspection
Scheduling a professional inspection of your heating system is a vital first step in preparing for the colder months. A licensed technician can identify potential issues, such as worn-out components or leaks, that could lead to costly repairs if left unattended. Regular inspections also help maintain the efficiency of your heating system, ensuring it runs smoothly and uses energy effectively.
Tips for Homeowners to Perform Basic Maintenance
While professional inspections are essential, there are several maintenance tasks homeowners can do themselves to keep their heating systems in good shape:
- Clean or Replace Filters: Dirty filters can reduce the efficiency of your heating system and affect indoor air quality. Check your filters monthly and replace them as needed, typically every 1-3 months, depending on usage and filter type.
- Inspect Vents and Registers: Ensure that all vents and registers are open and unobstructed by furniture or drapes. This allows for proper airflow and helps your heating system work efficiently.
- Check for Leaks: Look for any visible leaks around your furnace or boiler. If you notice any, it’s best to call a professional to address the issue promptly.
- Test Your Thermostat: Make sure your thermostat is functioning correctly and set to the desired temperature. Consider upgrading to a programmable thermostat for better control over your heating schedule and energy savings.
Importance of Changing Filters
Changing the filters in your heating system is a simple yet crucial maintenance task. Clogged or dirty filters restrict airflow, forcing your system to work harder to heat your home. This not only increases energy consumption but also shortens the lifespan of your heating system. Regularly changing filters helps maintain optimal airflow, improves indoor air quality, and reduces the risk of system malfunctions.
By taking these steps to check and maintain your heating system, you can ensure a warm and comfortable home throughout the fall and winter months. Stay ahead of potential issues and keep your heating system running efficiently to enjoy peace of mind and a cozy living environment.
Inspect and Insulate Pipes
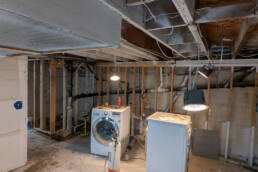
As temperatures drop, your home’s plumbing system becomes more vulnerable to cold weather, particularly in unheated areas like basements, crawl spaces, attics, and garages. Taking proactive steps to inspect and insulate your pipes can prevent costly and disruptive issues, such as pipe bursts and water damage. Here’s what you need to know:
Why Pipe Inspection Is Crucial Before Winter
Inspecting your pipes before the onset of winter is essential to identify and address any vulnerabilities that could lead to freezing or bursts. Pipes that are already damaged, leaking, or poorly insulated are at higher risk of freezing. A thorough inspection allows you to spot and fix these issues early, ensuring that your plumbing system is ready to withstand the cold.
Tips for Insulating Exposed Pipes
Insulating exposed pipes is a simple and effective way to protect them from freezing temperatures. Here are some tips to help you get started:
- Identify Vulnerable Pipes: Focus on pipes in unheated or exterior walls, as these are most susceptible to freezing. Also, consider insulating pipes that are located near exterior doors or windows.
- Choose the Right Insulation Material: Pipe insulation materials come in various forms, such as foam tubing, fiberglass wrap, or heat tape. Foam tubing is easy to install and provides good insulation for most pipes. For extremely cold areas, heat tape that is thermostatically controlled can provide additional protection.
- Proper Installation: When applying insulation, ensure that there are no gaps or exposed sections of pipe. Use duct tape or zip ties to secure the insulation in place. Be cautious not to compress the insulation, as this can reduce its effectiveness.
- Seal Drafts: In addition to insulating pipes, seal any drafts or openings near plumbing fixtures, particularly those leading to the outside. This helps maintain a stable indoor temperature and reduces the risk of pipes freezing.
How to Prevent Frozen Pipes
Frozen pipes can lead to bursts and significant water damage, making prevention crucial. Here are some strategies to keep your pipes from freezing:
- Maintain a Consistent Temperature: Keep your home at a steady temperature, even when you’re away. A setting of at least 55°F (13°C) can help prevent freezing. Open cabinet doors under sinks to allow warm air to circulate around the pipes.
- Allow Faucets to Drip: In extremely cold weather, let faucets drip slightly. This keeps water moving in the pipes, reducing the risk of freezing. It’s especially helpful for pipes that are located along exterior walls.
- Disconnect Outdoor Hoses: Drain and store outdoor hoses before winter sets in. Shut off the water supply to outdoor faucets and open them to allow any remaining water to drain out, preventing the water in the hose bib from freezing and causing damage.
- Install Pipe Sleeves or Heat Tape: For extra protection, consider installing pipe sleeves or heat tape on pipes in vulnerable areas. Heat tape provides controlled warmth to keep pipes above freezing.
Taking these preventive measures can safeguard your home’s plumbing system from the challenges of cold weather. By inspecting and insulating your pipes, you can enjoy peace of mind and avoid the inconvenience and expense of dealing with frozen or burst pipes during the winter months.
Prepare Your Water Heater
As winter approaches, ensuring your water heater is in optimal condition is essential for maintaining a consistent supply of hot water, especially during colder months. Proper maintenance can extend the life of your water heater, improve efficiency, and prevent potential issues. Here’s how to prepare your water heater for the season:
Importance of Flushing the Water Heater
Over time, sediment and mineral deposits can accumulate at the bottom of your water heater tank. This buildup reduces the efficiency of your water heater by forcing it to work harder to heat water, which can lead to increased energy bills and a shorter lifespan for the unit. Flushing the water heater removes these sediments, improving efficiency and ensuring consistent water temperature.
To flush your water heater:
- Turn off the Power Supply: If you have an electric water heater, turn off the power at the circuit breaker. For gas water heaters, set the thermostat to the pilot setting.
- Connect a Hose: Attach a garden hose to the drain valve at the bottom of the tank. Place the other end of the hose in a suitable drainage area, such as a floor drain or outside.
- Drain the Tank: Open the drain valve and let the water flow out until it runs clear. This indicates that most of the sediment has been flushed out.
- Close the Valve and Refill the Tank: Once the tank is drained, close the drain valve, remove the hose, and turn the water supply back on. After the tank is full, restore the power to the water heater.
Checking for Leaks and Sediment Buildup
Regularly inspecting your water heater for leaks and sediment buildup is crucial to preventing potential issues. Here’s what to look for:
- Check for Leaks: Inspect the area around your water heater for any signs of water, including puddles or dampness. Leaks can occur at the tank, connections, or valves. If you find a leak, it’s important to address it immediately to prevent water damage and further complications.
- Monitor Sediment Levels: Even if you regularly flush your water heater, some sediment may still accumulate over time. Listen for popping or rumbling noises, which can indicate a significant buildup of sediment. If you notice these sounds, consider having a professional perform a thorough cleaning or inspection.
Setting the Temperature for Energy Efficiency
Adjusting the temperature setting on your water heater can have a significant impact on energy efficiency and safety. The recommended temperature for most water heaters is around 120°F (49°C). Here’s why this setting is beneficial:
- Energy Savings: Lowering the temperature reduces the energy required to heat the water, which can lead to lower utility bills.
- Prevention of Scalding: Setting the water temperature too high increases the risk of scalding, particularly for children and elderly individuals. Keeping the temperature at 120°F provides a safer environment.
- Extending Water Heater Life: Lower temperatures can reduce the buildup of mineral deposits and sediment, which helps prolong the life of the water heater.
By taking these steps to prepare your water heater, you can ensure reliable hot water supply, improve energy efficiency, and extend the lifespan of your appliance. Regular maintenance and monitoring will help you stay ahead of potential issues and enjoy a warm, comfortable home throughout the colder months.
Check for Leaks
As part of your fall and winter home preparation, inspecting your plumbing system for leaks is crucial. Even minor leaks can escalate into significant problems, causing water damage, increasing utility bills, and potentially leading to more severe plumbing issues. Here’s how to ensure your home is leak-free before the colder weather sets in:
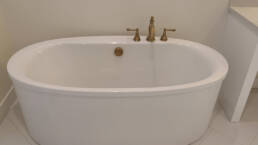
Importance of Inspecting Faucets, Toilets, and Under Sinks
- Faucets and Fixtures: Faucets are common sources of leaks, often due to worn-out washers, seals, or corroded valve seats. Inspect all faucets in your home, including those in the kitchen, bathrooms, and laundry room. Look for any signs of dripping, even if they appear minor, as these can waste a significant amount of water over time.
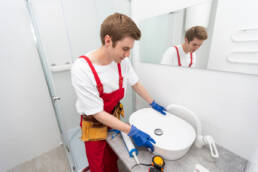
- Toilets: Toilets can also be a major source of hidden leaks, typically through the flapper valve in the tank. To check for leaks, add a few drops of food coloring to the toilet tank and wait for about 15 minutes without flushing. If the color appears in the bowl, you have a leak that needs to be addressed.
- Under Sinks and Hidden Areas: Leaks under sinks and in hidden areas like behind appliances can often go unnoticed. Regularly inspect these areas for any signs of moisture, mold, or discoloration, which can indicate a leak. Pay particular attention to connections at the base of sinks, around garbage disposals, and near dishwashers.
How Leaks Can Lead to Water Damage and Increased Bills
Even small leaks can lead to substantial water waste and damage over time. A dripping faucet can waste gallons of water per day, significantly increasing your water bill. Additionally, leaks can cause water damage to cabinetry, flooring, and walls, leading to costly repairs and potential mold growth, which poses health risks.
Water damage can weaken the structural integrity of your home, especially if leaks occur in areas like the foundation or around windows. Addressing leaks promptly helps prevent these issues and preserves the value and safety of your home.
DIY Tips for Fixing Minor Leaks
While some leaks may require professional repair, many minor leaks can be fixed with basic DIY skills and tools. Here are a few tips for common issues:
- Fixing Dripping Faucets: Most faucet leaks are due to worn-out washers or O-rings. Turn off the water supply to the faucet, disassemble the handle, and replace the worn components. Reassemble the faucet and turn the water back on to check if the leak is resolved.
- Stopping Toilet Leaks: If the food coloring test reveals a leak, the flapper valve is often the culprit. Replace the flapper valve, ensuring it creates a tight seal. If the leak persists, consider replacing other components, such as the fill valve or the entire flush mechanism.
- Tightening Loose Connections: Loose or corroded connections under sinks can cause leaks. Tighten any loose nuts or replace faulty connectors using a wrench. For flexible hoses, ensure they are not kinked or damaged, as this can also lead to leaks.
- Sealant and Plumber’s Tape: For small leaks around joints or fittings, applying plumber’s tape or a waterproof sealant can provide a temporary fix until a more permanent solution is possible.
By regularly checking for leaks and addressing them promptly, you can prevent water damage, save on water bills, and maintain the efficiency of your plumbing system. If you encounter persistent or severe leaks, it’s best to consult a professional plumber to ensure the issue is properly resolved.
Protect Your Outdoor Plumbing
Outdoor plumbing systems, including faucets and irrigation systems, are particularly vulnerable to freezing temperatures, which can lead to burst pipes and costly water damage. Taking steps to winterize these systems is crucial for protecting your home and preventing unnecessary repairs. Here’s how to safeguard your outdoor plumbing before winter sets in:
Steps to Winterize Outdoor Faucets and Irrigation Systems
- Turn Off the Water Supply: Locate the shut-off valve for your outdoor faucets and irrigation systems, typically found in the basement, crawl space, or utility room. Turn off the water supply to prevent water from entering the outdoor pipes during the winter.
- Drain the Pipes: After shutting off the water supply, open all outdoor faucets to drain any remaining water. This step is essential to prevent water from freezing and expanding inside the pipes, which can cause them to burst.
- Blow Out Irrigation Systems: For irrigation systems, it’s important to remove any remaining water in the lines. This can be done using an air compressor to blow out the pipes. If you’re unfamiliar with this process, consider hiring a professional to ensure it’s done correctly and safely.
- Install Faucet Covers: Once the pipes are drained, protect your outdoor faucets by installing insulated covers. These covers provide an extra layer of protection against freezing temperatures, helping to prevent potential damage.
- Insulate Exposed Pipes: If you have any exposed outdoor pipes, consider wrapping them with insulation or heat tape designed for outdoor use. This can help keep the pipes warm and reduce the risk of freezing.
Importance of Disconnecting Hoses and Draining Outdoor Pipes
- Disconnect Hoses: Leaving hoses connected to outdoor faucets during the winter can trap water in the hose bib and the connected pipe. When this water freezes, it expands, increasing the risk of burst pipes. Always disconnect hoses from outdoor faucets, drain any remaining water, and store them indoors.
- Drain Outdoor Pipes: Even a small amount of residual water in outdoor pipes can freeze and cause damage. After disconnecting hoses and turning off the water supply, make sure to drain all outdoor pipes completely. This includes sprinkler lines, drip irrigation systems, and any other water-filled outdoor fixtures.
- Preventative Benefits: By taking these steps to protect your outdoor plumbing, you can avoid the inconvenience and expense of dealing with burst pipes and water damage. Proper winterization not only safeguards your plumbing system but also helps maintain the integrity of your home’s structure and landscape.
Ensuring that your outdoor plumbing is properly winterized is a key component of preparing your home for winter. By following these steps, you can enjoy peace of mind knowing that your outdoor faucets and irrigation systems are protected against freezing temperatures and the potential damage they can cause.
Inspect and Clean Gutters
As part of preparing your home for fall and winter, inspecting and cleaning your gutters is essential. Gutters play a crucial role in directing rainwater and melting snow away from your home’s foundation, but they can become clogged with leaves, twigs, and other debris, especially during the fall. Proper maintenance of your gutters helps prevent water damage and other related issues.
Importance of Gutter Maintenance in Fall
During the fall, leaves and other debris can accumulate in your gutters, blocking the flow of water. If left unchecked, this buildup can lead to various problems, including water overflow, ice dams, and damage to your roof and foundation. Regular gutter maintenance helps ensure that water is properly channeled away from your home, protecting it from potential water damage.
Tips for Clearing Debris and Checking for Clogs
- Safety First: Before starting any gutter cleaning, ensure you have a sturdy ladder and consider using a harness if your home is more than one story. Wearing gloves and eye protection can also help protect against sharp debris and splashes.
- Remove Large Debris: Use a small trowel or scoop to remove large debris like leaves, twigs, and dirt from the gutters. You can also use your hands, but be cautious of sharp objects or pests.
- Flush the Gutters: After removing the larger debris, use a garden hose to flush out smaller particles and check for clogs. Start at the end opposite the downspout and work towards it, ensuring that water flows freely through the gutters and downspouts.
- Check for Clogs in Downspouts: If water does not drain properly, there may be a clog in the downspout. You can use a plumber’s snake or a high-pressure hose attachment to clear it. In some cases, you may need to disassemble the downspout to remove the clog manually.
- Inspect for Damage: While cleaning, check for signs of damage to the gutters and downspouts, such as rust, corrosion, sagging, or cracks. Repair any damage promptly to prevent further issues.
How Clogged Gutters Can Lead to Ice Dams and Roof Damage
Clogged gutters can cause significant problems, particularly in winter, when temperatures fluctuate between freezing and thawing:
- Ice Dams: When gutters are clogged, melting snow on the roof cannot drain properly and refreezes at the edge of the roof, forming ice dams. These ice dams can block further melting snow from draining, causing water to back up under the roof shingles and leak into your home, leading to water damage to ceilings, walls, and insulation.
- Roof Damage: The weight of water, ice, and debris in clogged gutters can cause them to pull away from the house, potentially damaging the fascia and soffit. Additionally, trapped water can seep into the roof structure, leading to rot and structural damage over time.
- Foundation Problems: Overflowing gutters can lead to water pooling around your home’s foundation, increasing the risk of basement flooding and foundation erosion. This can result in significant structural issues and costly repairs.
Regular gutter maintenance is a simple yet crucial task that helps protect your home from the adverse effects of water damage. By keeping your gutters clear and well-maintained, you can prevent ice dams, roof damage, and other issues, ensuring your home stays safe and dry throughout the fall and winter seasons.
Emergency Preparedness
Being prepared for plumbing emergencies is an essential part of maintaining your home, especially as colder weather approaches. Quick and effective response to issues like burst pipes or gas leaks can prevent extensive damage and ensure the safety of your household. Here’s how to prepare for plumbing emergencies:
Importance of Knowing How to Shut Off Water and Gas Valves
Water Valves: In the event of a plumbing emergency, such as a burst pipe or severe leak, knowing how to quickly shut off the main water supply is crucial. This can prevent flooding and minimize water damage. Locate the main water shut-off valve, typically found where the water line enters the house, in the basement, crawl space, or utility room. Make sure all household members know its location and how to operate it. Additionally, familiarize yourself with shut-off valves for individual fixtures, like toilets and sinks, which can be used to isolate specific issues.
Gas Valves: If your home uses natural gas, it’s equally important to know how to shut off the gas supply in case of a leak or emergency. Gas leaks pose a serious risk of fire and explosion, so immediate action is necessary. The main gas shut-off valve is usually located near the gas meter outside your home. Instruct family members on how to safely turn it off if they smell gas or suspect a leak. Remember, if you suspect a gas leak, it’s crucial to evacuate the area and contact emergency services before attempting to shut off the gas.
Creating an Emergency Kit with Plumbing Tools and Supplies
Having an emergency plumbing kit readily available can help you address minor issues quickly and efficiently. Here are some essential items to include in your kit:
- Adjustable Wrench: A versatile tool for turning valves and fittings.
- Pipe Wrench: Useful for loosening and tightening pipes.
- Plumber’s Tape: Also known as Teflon tape, this is essential for sealing threaded connections and preventing leaks.
- Pipe Repair Clamps: Temporary solutions for sealing leaks until a professional repair can be made.
- Buckets and Towels: Handy for catching water and minimizing damage in case of leaks.
- Plunger: Useful for clearing minor clogs in sinks, toilets, and drains.
- Flashlight: Ensure it has fresh batteries; this is crucial for working in dark or poorly lit areas.
- Safety Gear: Include gloves and goggles to protect yourself during repairs.
- Emergency Contact Numbers: Keep a list of emergency contacts, including your plumber, gas company, and local emergency services.
Additional Supplies
- Extra Gaskets and Washers: Useful for quick fixes on faucets and other fixtures.
- PVC Pipe and Fittings: For emergency repairs on plastic piping systems.
- Plumbing Snake or Auger: Helpful for dealing with clogs that a plunger can’t clear.
By knowing how to shut off water and gas valves and keeping a well-stocked emergency kit, you can manage plumbing issues swiftly and effectively. This preparedness not only helps prevent extensive damage but also provides peace of mind, knowing you can respond appropriately to unexpected situations.
Conclusion
As the fall and winter seasons approach, preparing your home’s plumbing system is essential for ensuring comfort and safety. By taking proactive steps to check your heating system, inspect and insulate pipes, prepare your water heater, protect outdoor plumbing, clean gutters, and plan for emergencies, you can prevent common cold-weather issues and minimize potential damage.
Regular maintenance and timely repairs not only help preserve the integrity of your home but also save you money by reducing the risk of costly repairs and improving energy efficiency. Remember, prevention is always better than cure. Investing time and effort in preparing your home now will pay off in the form of a safe, warm, and comfortable environment throughout the colder months.
If you’re unsure about any of these tasks or encounter issues beyond your DIY capabilities, don’t hesitate to contact a professional plumber. At Foose Plumbing, we are committed to helping you keep your home in top condition year-round. Contact us today for expert advice and services tailored to your needs.

Foose Plumbing: Your Premier Partner for Exceptional Plumbing Solutions
Discover unparalleled expertise and seamless collaboration with Foose Plumbing, the pinnacle of plumbing services in Denver. As the leading plumbing service, Foose Plumbing stands as the ultimate choice for construction projects seeking precision, reliability, and unwavering compliance.
Like this article? Spread the word!
Related Posts
November 15, 2024
Foose Plumbing: Denver’s Trusted Partner for Reliable, High-Quality Plumbing Solutions
Foose Plumbing offers top-tier plumbing services in Denver, Colorado. From emergency…
July 8, 2024
The Essential Guide to Choosing the Right Plumber in Denver
Discover top-notch plumbing services in Denver with Foose Plumbing. From leak detection…

June 19, 2024
Navigating Home Plumbing: Tips and Tricks with Foose Plumbing
Discover expert plumbing tips for Denver homes with Foose Plumbing. From preventing…